
Puppet Stage
Puppet
Stage
When we started out in ministry we were given a few animal puppets and couldn't afford a puppet stage so we had he kids still use the puppets since GOD spoke to us to use what we had in our hands! Literally! The older kids would mime using the puppet to a powerful song and found this simple act ministered to the young and old alike!
After our maiden trip south, we came home and were asked to do a youth camp for a whole week providing daily chapel services. Mary Ann, my wife, asked if I could somehow come up with a puppet stage. Again we felt the LORD lead us in using what we had in our hands since we still couldn't afford a professional puppet stage.
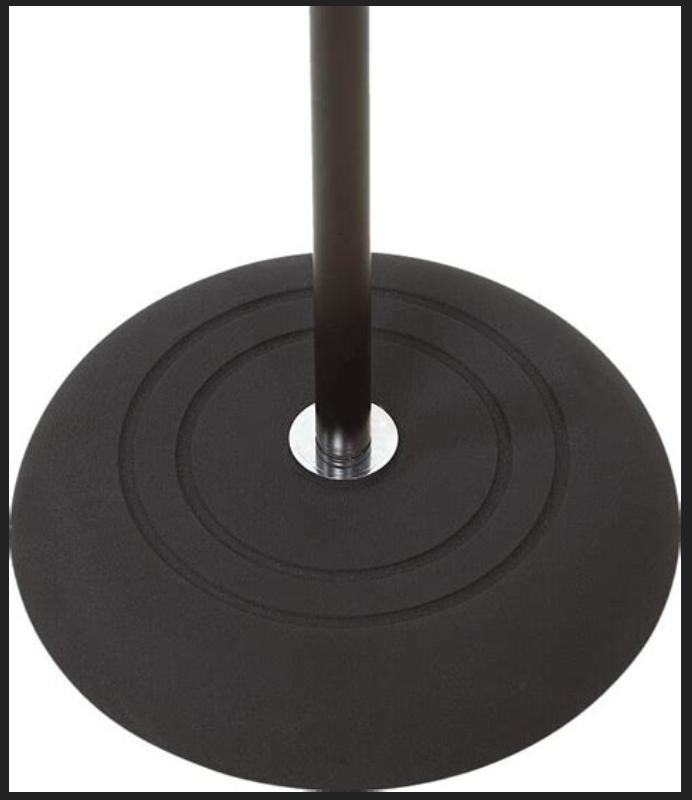
We had some broken mic stands in the garage that we weren't using and the mic stand base was the old fashioned round cast iron base with a three foot chrome bar screwed in. We removed the top parts like the threaded tightener so just the single chrome pole remained attached to the base. It made a perfect stand but we only had two. We contacted a nearby church and asked if they had any and voila, they had two more! When the base threads eventually stripped we used Gorilla glue which expanded upon drying and formed a solid fast connection to the cast iron base extending the life of the stand.
Another church gave us some 'crush velvet' material which they had purchased for a puppet stage and had a lot left over! That particular material was perfect because it had a wrinkled look, so packing it away in a tight trunk didn't matter! We were on our way towards building our puppet theater!

We decided on using parts readily available from Home Depot/Lowes and went with two 1” electric conduit schedule 40 pipe with a flared end (Comes in 10 foot lengths)

Bell
end of PVC conduit 1” Pipe

We
purchased a spray can of purple PVC “PipeWeld” all-in-one
Cement (HomeDepot SKU #1000987111)
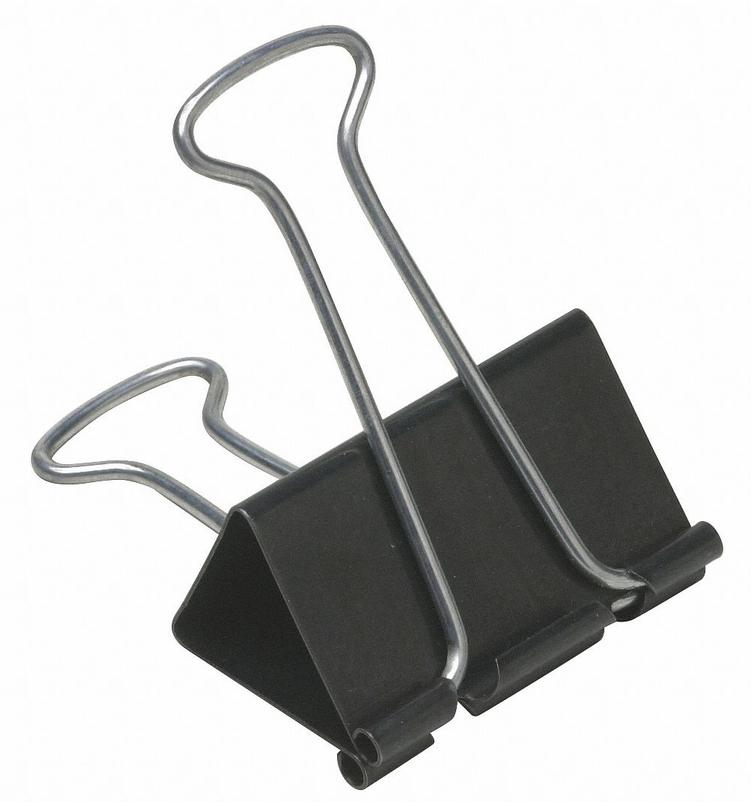
We purchased dozens of large 2” Binder Clips from Walmart to quickly seal the curtain around the pvc pipe as well as join sections of curtains together.
2”
Binder Clips

For
quick assembly of pipes we got some 1/4 in. x 1-3/4 in. Round Locking
Pin (Home Depot Model # 883838)
Also from HD/Lowes we purchased two - 1” PVC Conduit Gradual Elbow which curves 90° over 9.5” sometimes called a “slo-bend elbow”

Four - T’s (1” PVC)

Two Couplings/Coupler to extend the width of puppet stage for the Front bar and Back top bar. (If you know you'll always have a 4x8 footprint for the stage and never need a 4x4 footprint then you can change the plan.

Some of the joints can be permanently glued. But before you glue, make sure it all pieces fit together as planned, then mark the joints with a pencil to get the right position, especially on the gradual elbow.
Get a small rubber mallet for knocking pipes apart as they seem to tighten up when the stage is assembled from the stress and movement, etc.
When you use a "Round Locking Pin" that joint should be to be pre-drilled using a 3/8" drill bit to make a hole through coupling/bell end and the pipe. When doing this make sure the stage fits together as desired and mark with a pencil the precise position before drilling all the way through. We found doing a pilot hole using a 1/8" drill bit helped tremendously.

Essentially the stage consists of Six Sections
Front Legs (Left & Right) Each side is a single piece of 1" PVC Pipe and fits down over the mic stand
Back Legs (Left/Right) Each side is a single piece of 1" PVC Pipe with the bell/flared end up and fits down over the mic stand
Side bars (Left & Right) Consist of 3 parts. The gradual 1" PVC elbow glued into the top end of a 1" PVC "T" along with a 34" long pipe glued into the other side of the top end of the "T". Note the left Side Bar is a mirror of the right Side Bar. Set the Side Bar on the Front Legs then tread the side curtain on making sure correct side faces out and slide curtain all the way towards Front Legs so things balance. (sorry about the poor pics)

Front bar (expandable) Consist of two 1" PVC pipes with a coupling. One side of the coupling is glued to the longer Front Bar pipe and the other end of the coupling has a "Round Locking Pin" securing 1" pipe into coupling. This allows for your stage to be a full 7 feet wide or when you leave out the longer front bar, your stage is now about 3 feet wide. If you don't need the expandable feature then cut your Front Bar to the desired width of your stage. Also make sure the Back Bar is the same width. Once Front Bar is assembled, thread curtain on bar making sure the front side faces out then place into the bell end of the Gradual Elbow securing with a "Round Locking Pin"
Back Lifters (Left/Right) Identical pieces consisting of 4 parts all glued together Short 1" pipe into T then another pipe up to another T which is angled 90 degees to the lower T (See Pic). The Lifter fits into the bell end of the Back Leg. The Side Bar fits into the lower "T" and a "Round Locking Pin" is used to secure Side Bar to Back Lifter. The Back Bar is assembled
Back Bar (expandable) Consists of two Pipes like the Front Bar where one piece is glued to a coupler and the other piece uses a "Round Locking Pin" to secure it. Again if you don't need the expandability feature to make your stage flexible for two sizes of footprints, then you can use one solid piece of pipe and eliminate the coupling and "Round Locking Pin". Thread Curtain on the Back Bar before connecting to Upper Back Leg T's. Again make sure the front faces the audience. At this point a second set of hands is useful.
Optional Expansion Sides - The Back Lifter has a "T" on top and the unused end can be used to extend additional curtains out to create a backstage area. (See pics below where we used a 45 degree coupler and 6-8 foot 1" PVC with additional curtains. We then added a T at the end and dropped it onto a 1" pvc pole cut to the height of the Back Bar of the stage and had it sit on a mic tripod or another old mic stand.
We carried spare 1" pvc parts like couplers, T's, 45's 90's, lots of clips and some extra pipe along with the spray glue! Our back stage area at times was quite elaborate since we usually kept the stage set up for 5 days. We could sparingly use duct tape to secure the joints on the extension parts of the stage since there were no puppets and people mashing up the bars! But on the stage itself we soon found that duct tape alone wouldn't hold as puppets and people can bump and sit props, etc on the stage bars. Plus the duct tape left sticky residue which can ruin the curtain and make a mess of the pipes.
From the bell end of the pipe measure _ inches and cut both pipes so you end up with two pieces inches each containing an bell end
The Front crossbar is two pieces:
One is 48 inches long 1” pvc pipe
One is 16 inches long 1” pvc pipe with glued coupling
When connected together this makes the stage 7 feet wide.
Fit 48” side of pipe into coupling then drill a hole through the 48” side of the coupling large enough to allow a wire lock pin
Top Back crossbar is two pieces of 1” pvc:
One is 48 inches long
One is 36 inches long with coupling glued on one end
When connected together this makes the stage 7 feet wide
Fit 48” side of pipe into coupling then drill a hole through the 48” side of the coupling large enough to allow a wire lock pin
Back Leg = 43 inches 1” PVC with Bell flare on one end
Front Leg = 48” long to sit on mic stand
Side Bar = 48” (gradual elbow 10” + 2” T + 34” pipe + 2” T)
Back Lifter = 32” (7” Pipe + 1” T + 23” pipe + 1” T) The picture doesn't show the top of the Back Lifter, but on top is a T that is positioned perpendicular to the lower T to allow the Back Bar to cross over to the other Back Lifter.
The longest pieces were 48” so to fit in a 4 foot bag.
50” high from top of front bar to floor.
Puppet Stage Setup
Stage designed to be set up in two sizes to accommodate a small stage footprint
1 – Approximately 7 feet wide by 4 feet deep
2 – Approximately 3.5 feet wide by 4 feet deep
So front curtain was approximately 8 feet wide by 50 inches high accounting for the 2” loop sewn in to accommodate the 1” pipe.
Before cutting any material measure to make sure it will drag on the floor from the puppet stage frame.
The curtain loop should be large enough to allow not just the 1” pipe but the 1-3/4 inch Round Locking Pin. So a minimum of a 2” loop which is more than 2 inches by the time you account for sewing seems, etc.
Always double check your measurements!
We sewed a fringe on the bottom which you can see in the top photo.
We put different colored tape on the various pieces:
Black tape is back section of the stage
White tape is right side of the stage
Grey pipe is either side of back section of the stage
White pipe is front section of the stage
Remember these terms:
Front means the side facing the audience
Back is the side furthest from the audience
Right side is the side on the right when you face the audience
Left side is the side on the left when you face the audience
When you screw pipe together do not tighten. Back off a 1/2 turn so pipes don't lock.
As the stage is being used we later find the pipes will tighten making it very hard to tear down and sometimes even breaking the glue joints.
Installation Instructions
1: Stands - Position the mic stands about 6-7 feet apart.
We later made a mat template to lay down first showing exactly where the stands went.
Front being the side facing the audience
Position the front stands about 4 feet apart from the rear/back stands
2:Legs – Place the two longest white pipes over the front stands
Place the two longest gray pipes over the rear stands
The gray pipe with white tape goes on the rear right stand.
All pipes are labeled as such
Find the two gray pipes that have 2 T connectors.
Place onto the two rear leg pipes with lower T facing the front of the stage
Again the one with white tape goes on the right rear leg
3:Sides – Locate two gray pipes with a 90 degree curves at the end and curtains on them
Locate which is right (White tape and labeled)
Screw the end of this side bar into the rear leg at the lower T connector.
Stop turning the side bar so that the front T is located over the front leg.
You may have to back off your turns so it's not tight.
You may have to move the base stands so things line up.
Rotate front right leg so it screws into the side bar's front T
Do the same with the left side
4:Front – Locate short white pipe labeled (Across Front) we'll call this A
Screw this pipe onto the right side connecting at the curve joint
Locate front curtain on white pipe (labeled as such)
Hold this up to the left of the pipe you just screwed in and adjust left leg stand if needed.
Then screw the right curtain pipe into the left side of A
Rotate till almost tight and then on the left side back off so the black mark matches up with the black mark on the left side bar.
Remove pin and insert front white bar into the left side bar and repin.
5:Rear – Located back/rear gray short pipe with no curtain (labeled as such), We'll call this A
Screw this pipe into the rear leg at the top of the T
Locate rear gray pipe with curtain on it and screw it into A
Adjust the left leg stand so the top T will fit the rear bar
Turn back bar so the black marks line up at the left top connection point.
Remove Pin and line up holes then repin
6:Clips – Spread curtains along bars evenly
Then using huge paper clips in zip bag clip the curtains at various points so the puppet stage bars are not seen by the audience.
7:Tear Down – Do the reverse steps above rolling up curtains onto poles


